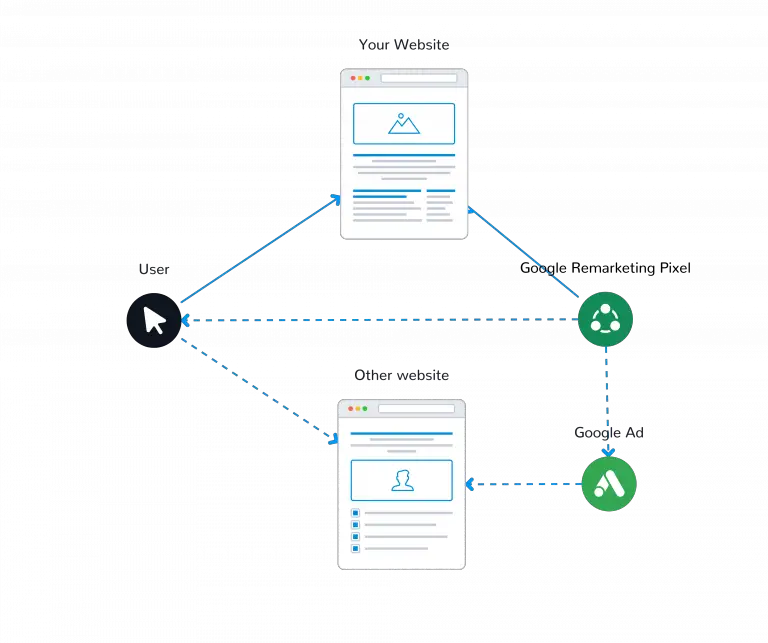
How to set up Google Ads Remarketing
Create a remarketing list in Google Ads
- Within the Audience Manager navigate to Segments
- Plus Icon
 -> Create a new list for Website visitors
 - Name your audience segment
- Segment members by …
- Visitors of a page: You can enter multiple page rules with AND and OR connector
- Visitors of a page who also visited another page
- Visitors of a page who did not visit another page: Great for not completed actions like a sign-up or purchase
- Visitors of a page with specific tags: Those are Google tags you may have set up previously. You can also create a new tag from here.
- Enter your page parameters
- Select the pre-fill options: Only available if the tag has been set up previously
- Select the membership duration of how long people will stay in the audience segment. In order to achieve a remarketing effect, don’t extend this time period too long.
- (Optional) enter a description for the audience segment
- Create segment
Target the remarketing audience segment with Google Ads
- In your Google Ads Manager navigate to Campaigns
- Plus Icon -> New campaign
- Select your campaign objective and potentially conversion goal
- Select the campaign type: recommended display or video
- Follow the instructions to set up your ad, we will only focus on the targeting settings here.
- Targeting -> Audience Segment -> Select your remarketing audience
- Tracking: Make sure to enable correct tracking. Auto-tagging is the best option. You can also use custom UTM parameters.
Next on your Marketing School Curriculum


Sascha is a Lifecycle Marketing Consultant with over 8 years of digital marketing experiences in Silicon Valley, the UK, and Germany.
After leading the demand generation for a 100+ million company, he decided to venture out on himself. He’s now helping clients to attract and convert more leads and customers.
His main focus are SEO, paid media & marketing automation – all with the focus to tie marketing campaigns to revenue.
Sascha has been featured in industry publications.